
If you’re thinking about how to migrate salon website to Hostinger, there’s a good chance one fear is holding you back more than anything else: what happens to your existing bookings during the switch?
It’s a fair worry. Your website isn’t just a brochure — it’s holding live client data. Upcoming appointments, deposit payments, staff schedules, client contact details. If something goes wrong mid-migration, you’re not just dealing with a broken webpage. You’re dealing with a client who shows up for a 2pm appointment that no longer exists anywhere in your system.
I’ve migrated enough salon and spa sites to know this fear is usually oversized compared to the actual risk — as long as the migration is done properly, in the right order, with the right safety checks. Done carelessly, though, it absolutely can go wrong. So let’s walk through exactly how to do this without losing a single appointment or a single hour of uptime.
Disclosure: This post recommends tools and services based on personal use and experience. If I join an affiliate program for any of these in the future, I’ll clearly mark those links as affiliate links.
Why Salon Sites Are Riskier to Migrate Than a Normal WordPress Site
A standard blog or brochure site migration is fairly low-stakes — worst case, a few hours of downtime while you fix something, and nobody’s business is directly affected.
A salon booking site is different because of what’s actually stored in the database:
- Active WooCommerce orders and deposit payments tied to real transactions
- Booking plugin data (Amelia, or similar) tracking appointment times, staff assignments, and service durations
- Client contact information and appointment history
- Appointments that may be scheduled for later the same day or week you’re migrating
If any of this data doesn’t transfer cleanly, you’re not looking at a cosmetic glitch — you’re looking at a client who paid a deposit for an appointment your system no longer knows about. That’s the real reason to slow down and do this methodically rather than rushing a quick host-to-host transfer.
Pre-Migration Checklist: What to Do Before You Touch Anything
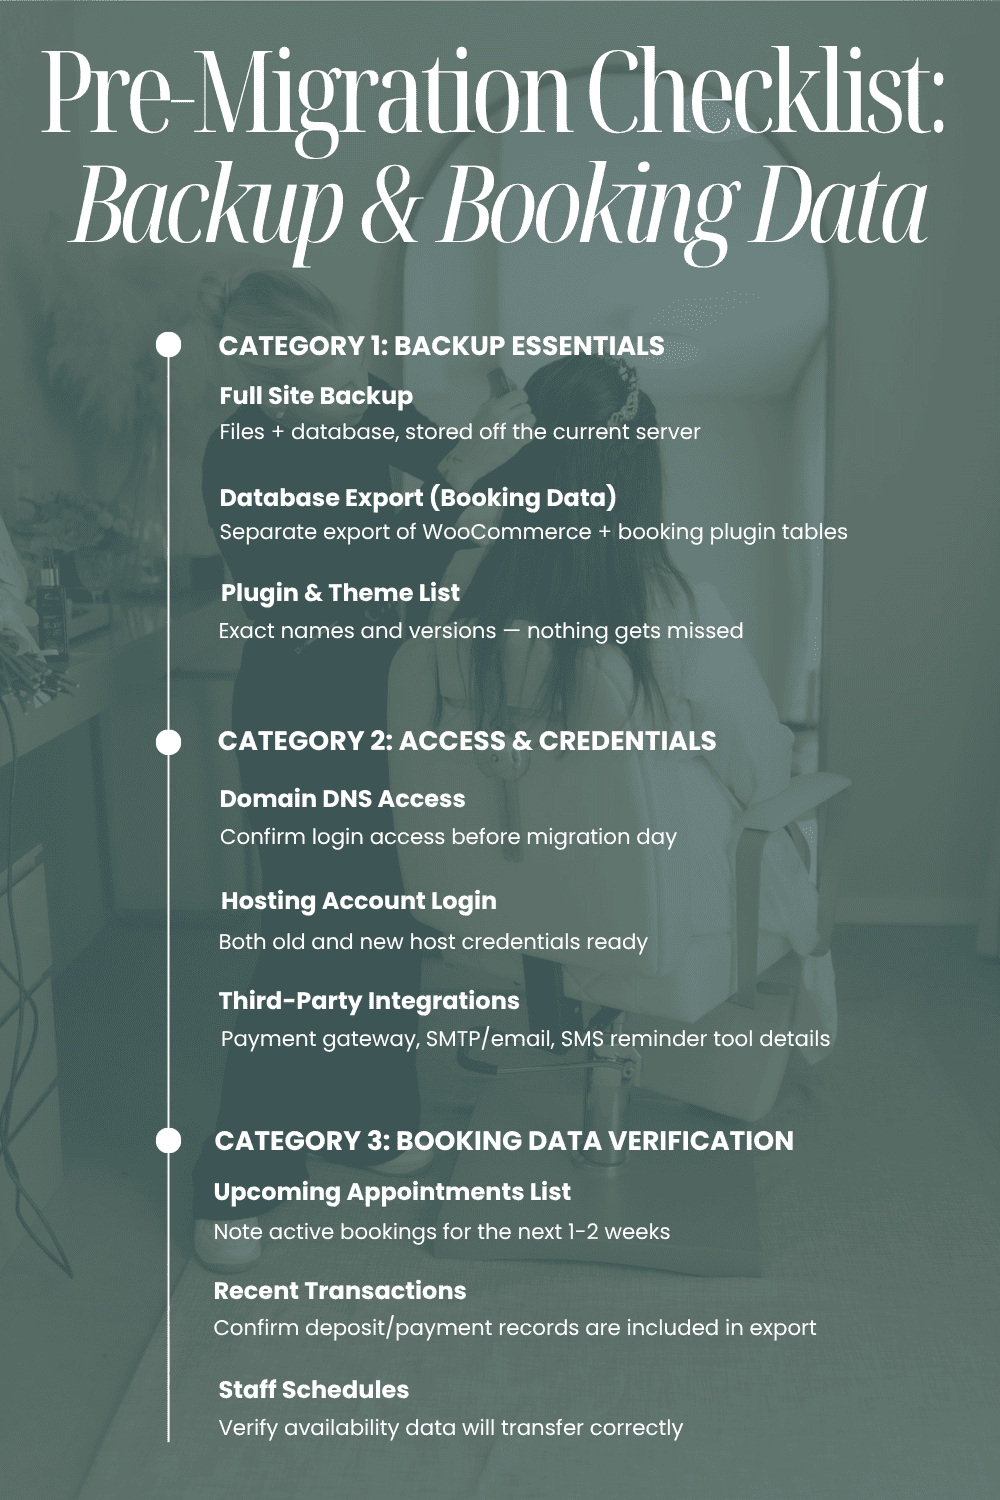
Before any migration begins, confirm you have all of the following secured and accessible:
- A full site backup — files and database, stored somewhere off the current host (not just a plugin backup sitting on the same server)
- A separate database export specifically covering your WooCommerce and booking plugin tables, so you can verify appointment data independently
- A complete plugin and theme list, including exact versions, so nothing gets missed on the new host
- Access to your domain’s DNS settings — you’ll need this later for the cutover, and it’s often the step people forget to confirm access to until it’s urgent
- A note of any third-party integrations — payment gateways, SMTP/email services, SMS reminder tools — since these often need reconfiguring after a host change
Skipping this stage is where most “lost data” migration horror stories actually start. It’s rarely the migration tool that fails — it’s someone moving forward without confirming they had a clean, verified backup first.
Step-by-Step: Migrating Without Downtime or Lost Appointments
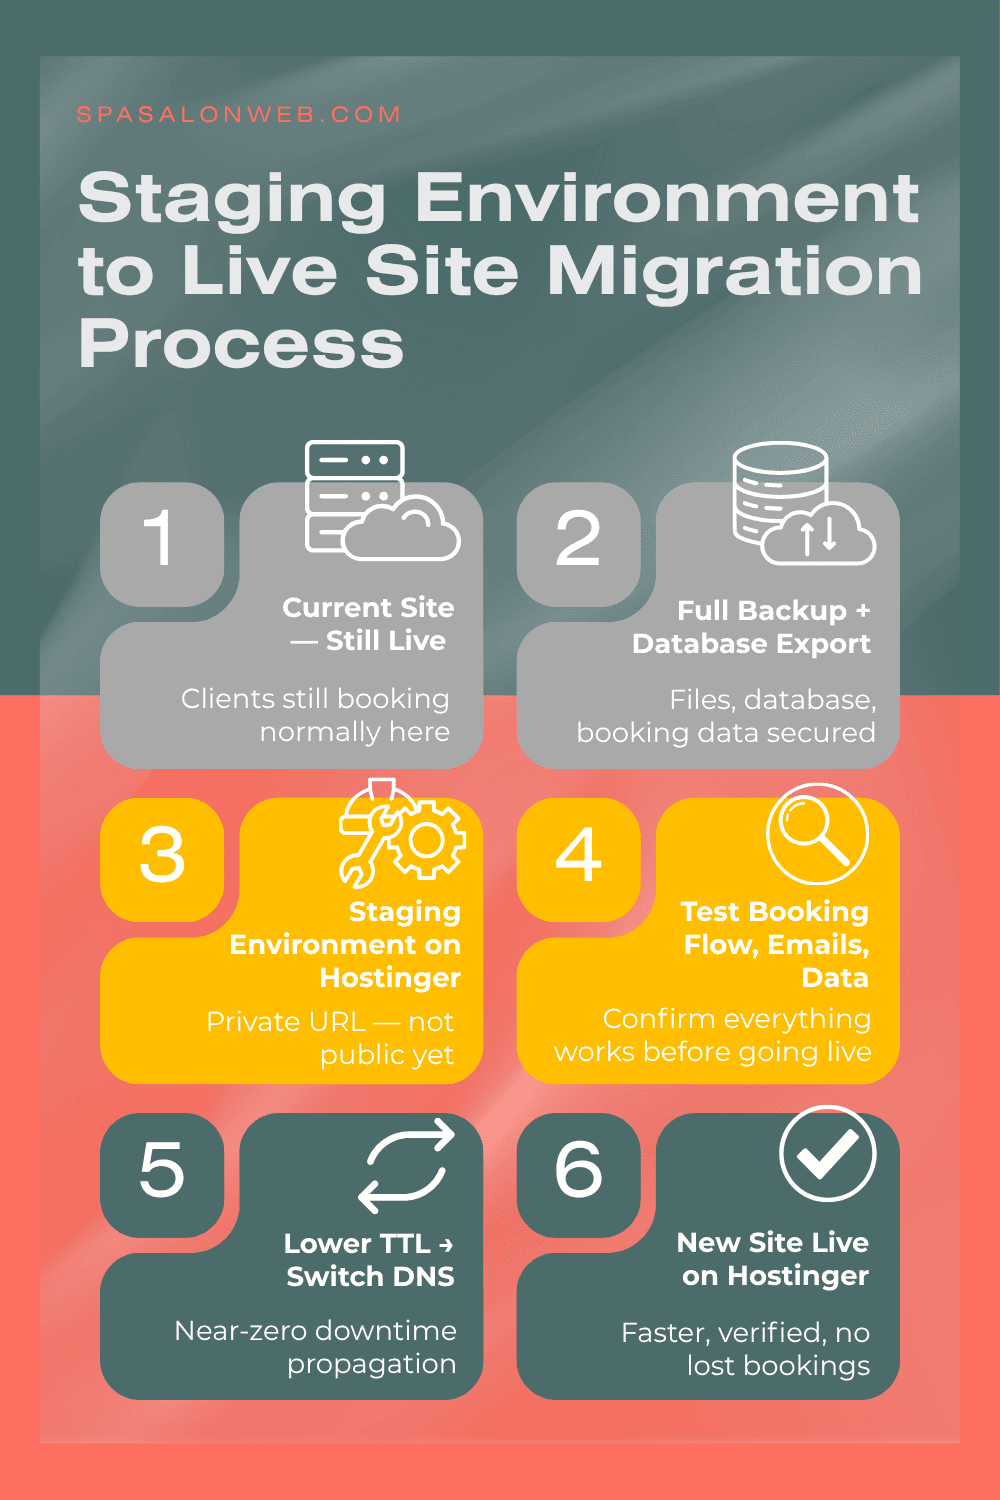
Step 1: Set Up a Staging Environment on Hostinger First
Never migrate live-to-live. Hostinger allows you to set up your new site on a staging URL or temporary domain that isn’t publicly connected yet. This gives you a working copy to test everything against before any client ever sees it.
Step 2: Migrate the Database With Booking Data Intact
Export your database and import it into the new staging environment, keeping the WooCommerce and booking plugin tables exactly as they are — don’t let any migration tool strip or “clean” this data automatically. Once imported, manually check that a handful of real upcoming appointments appear correctly on the staging site.
Step 3: Migrate Files and Reinstall Critical Plugins
Move your theme files, uploads, and plugins over. This is also the right time to reinstall and properly configure LiteSpeed Cache on the new host — Hostinger’s LiteSpeed-powered infrastructure only helps if the plugin is actually set up correctly, not just installed.
Step 4: Test the Full Booking Flow on Staging
Before going anywhere near DNS, actually book a test appointment on the staging site. Walk through it as a client would: select a service, pick a time, complete the booking, and confirm the confirmation email fires correctly. This single step catches the vast majority of migration issues before they ever become customer-facing.
Step 5: Lower Your DNS TTL in Advance
A day or two before the actual cutover, lower your domain’s DNS TTL (Time To Live) setting. This tells the internet to check for DNS changes more frequently, which dramatically shortens how long the switch takes to propagate once you flip it — this is the core trick behind a near-zero downtime migration.
Step 6: Do a Final Sync, Then Switch DNS
Right before cutover, do one final sync of any bookings or orders that came in since your last database export, so nothing placed during the transition window gets lost. Then update your DNS to point to the new Hostinger server.
Step 7: Confirm the Live Site Immediately
Once DNS has propagated, check the live domain — not just the staging URL — and repeat the same booking flow test you did on staging. This confirms the real, public-facing site works exactly as expected.
The Zero-Downtime DNS Trick, Explained Simply
The reason most migrations feel “risky” is that people flip DNS before confirming everything works, then scramble to fix issues while the site is already live and broken for visitors.
Lowering your TTL in advance and fully testing on staging first flips that order: you only switch DNS once you already know the new setup works. Combined with a low TTL, the propagation window — when some visitors might briefly see the old site and some see the new one — shrinks from potentially 24-48 hours down to often under an hour.
Post-Migration Checklist: What to Verify Immediately
Once you’re live on the new host, confirm each of these before considering the migration complete:
- The booking calendar loads correctly and shows accurate available time slots
- Past and upcoming appointments are visible and match what existed before migration
- Payment and deposit integrations process a test transaction successfully
- Booking confirmation and reminder emails are actually sending (check spam folders too)
- SSL certificate is active and the site loads securely with no browser warnings
- LiteSpeed Cache is installed, activated, and properly configured — not just present but actually caching
Common Mistakes That Cause Lost Bookings or Downtime
- Migrating during business hours. Even a smooth migration carries some risk — do it late at night or during your lowest-traffic window.
- Skipping the staging test. Going straight from old host to new host without testing the booking flow first is how broken calendars go unnoticed until a client complains.
- Forgetting SMTP/email reconfiguration. A new host often means booking confirmation emails silently stop sending unless email settings are manually reconfirmed.
- Not reinstalling LiteSpeed Cache properly. Moving to Hostinger without configuring LiteSpeed Cache means you keep the slow-site problem you were trying to fix in the first place.
- Not syncing last-minute bookings before final cutover. Any appointment booked between your last backup and DNS switch can get lost if you don’t do that final sync.
Should You Migrate This Yourself?
If you’re comfortable with backups, staging environments, and DNS settings, everything above is genuinely doable on your own with careful attention to each step. If any part of that sentence made you nervous, that’s a reasonable signal to have someone handle it for you — the cost of a professional migration is almost always smaller than the cost of even one lost appointment or a half-day of downtime during your busiest hours.
Want this done for you instead of risking it yourself?
I offer a done-for-you salon website migration to Hostinger — full staging setup, booking data verification, LiteSpeed Cache configuration, and a zero-downtime DNS cutover, so your clients never notice a thing changed except how much faster your site loads.
Ready to Switch Hosts? Let's Do It With Zero Downtime
Frequently Asked Questions — migrate salon website to Hostinger
Q1: Will I lose my existing appointments when I migrate my salon website to Hostinger?
A: Not if the migration is done correctly. Exporting your database with WooCommerce and booking plugin tables intact, then verifying appointment data on a staging site before going live, prevents booking data from being lost during the switch.
Q2: How much downtime should I expect when migrating a salon website?
A: With a staging environment, a lowered DNS TTL, and a proper cutover process, downtime is typically minimal — often under an hour of partial propagation rather than a full site outage.
Q3: Do I need to reinstall LiteSpeed Cache after migrating to Hostinger?
A: Yes. Migration tools often move plugin files but don’t automatically reconfigure caching settings. LiteSpeed Cache needs to be reinstalled and properly configured on the new host to actually improve site speed.